Podcast: Play in new window | Download (Duration: 15:39 — 22.3MB) | Embed
Subscribe: Spotify | Amazon Music | Email | TuneIn | Deezer | RSS | More
A ClickUp Content Calendar Tutorial for Social Media Planning
If you are picky about the way your content calendar looks then this ClickUp content calendar tutorial may just be what you need.
While there are a ton of options on the market to create social media calendars.
Let’s face it, not all the options available fall into the category of pretty or cute.
Some of them are very simple in their approach while others offer very practical options.
Like integrations to popular software or applications.
Let me know if you can relate to this.
You have been using a content calendar in your business for a few years in a somewhat consistent fashion.
In recent times, your business has grown to the point where you are using a host of other solutions.
However, you need a social media content calendar that seamlessly integrates with other tools.
Like project management and time tracking.
What would be great is having a calendar that works really well with a CRM solution and appointment calendar for small businesses.
In this post, you will learn how to create a cute content calendar in ClickUp.
As well as how to customise it using the ‘automations’ feature, fields and templates for business efficiency.

How Content Calendar Integration Drives Business Efficiency
In case you are new to the whole concept of integrating tools let me take some time to explain.
When you get started in business the first 1-3 years is spent getting new clients onboard to generate a consistent income.
Over time you will notice that the bigger your business grows the more overwhelming things can feel.
What I mean by this is that business processes that are manual and repeatable can consume a lot of time.
It can also cause you to reach an imaginary ceiling where you can only process so many orders in a day.
The next automatic thought is for you to hire someone part-time to take over all these manual processes.
So that you can get back to your zone of genius.
However, when compared to cost efficiencies it would make more sense to pay for tools that handle those manual processes rather than hiring staff.
Of course, at some point, you will need to hire staff to complete certain jobs.
Tasks that can be automated should be done via integrated tools or native automation features.
ClickUp Content Calendar Integration Examples
One clever example of this is the ability to integrate ClickUp with Calendly which is an application for setting up appointments.
The benefit of having this integration is this.
When a potential client schedules some time in your calendar a task in ClickUp can be generated automatically for you.
Another smart integration is with Twilio.
If you never heard of Twilio it is a communications platform that uses SMS, voice, video, email and chatbots.
One way to use the ClickUp and Twilio integration is by sending a text message to key stakeholders when a task is completed.
I think that the one you would like the most is the integration with Amazon Alexa.
Imagine having the ability to automate a task list for a project or several projects by asking Alexa to do it.
You have to agree that the ClickUp with Alexa integration is the perfect reason to create a ClickUp content calendar.
Let’s look at how to get started creating your cute content calendar next.
Make a ClickUp Content Calendar
This may sound obvious but the first step in this entire process is to create an account in ClickUp if you don’t already have one.
You will be happy to know that ClickUp accounts are free to use.
If you run into any difficulty creating an account in ClickUp you can refer back to this ClickUp vs Asana post.
In that previous post, I walk you step by step on how to set up an account.
Once you have your ClickUp account all set up it is time to create your first workspace.
Step 1
Create a workspace for you to house everything related to you and your business, label it whatever you want.
The reason for doing this is that it will give you the option to assign each of your clients their own workspace as well.
Step 2
Next you will create a space or project hub for your content calendar. Simply go to your workspace and add a dedicated space.
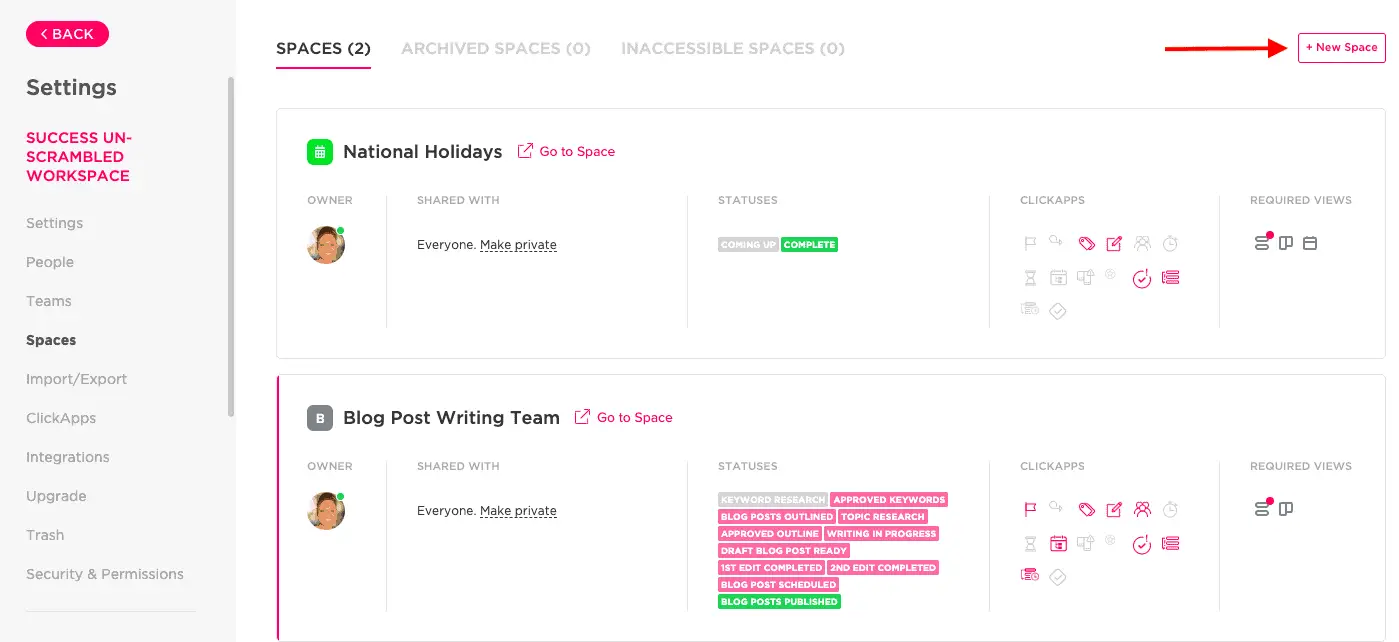
I know my screenshot may look a little bit intimidating but trust me this is super easy to do.
Step 3
The next thing you need to decide is what stages does your content workflows go through.
For example, how do you currently create content and who else is involved in that process.
This applies to blog posts, videos, social media posts and podcasts.
Ignore all the template options available to you in the templates section and choose custom.
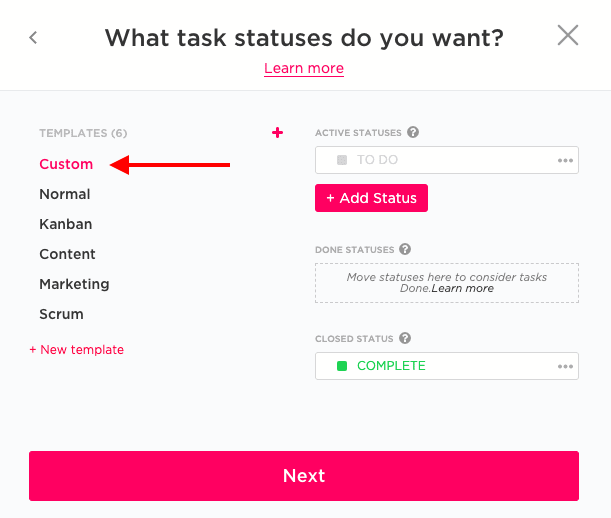
Then add a list of the status options that you would love your content to follow in terms of a workflow.
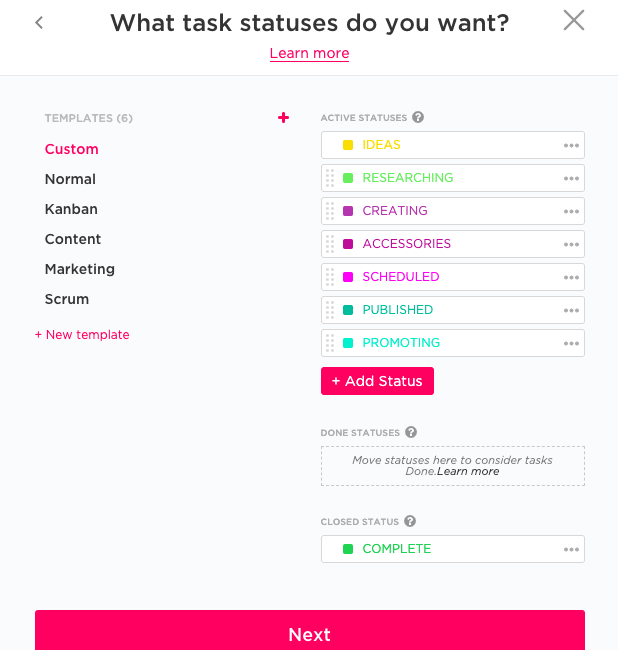
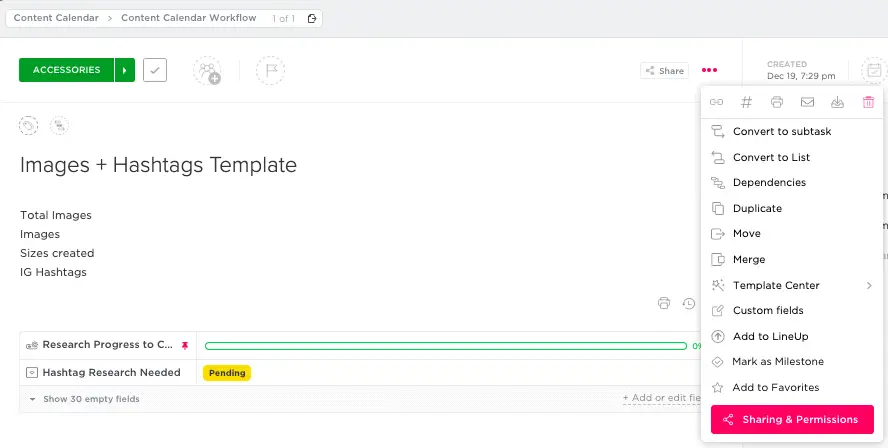
I could not think of a cool name for that part of the workflow where you get all the images and pretty links created so I named it accessories. Lol!!
Step 4
Now, ClickUp has a huge list of things called Apps that are there to help make your life easier.
The only problem is that it can feel overwhelming when you are not sure which ones to leave on or which to switch off.
Remember that you can switch them on or off later on.
Step 5
This is going to start feeling like if you are shopping for clothes with matching shoes and handbags but hold on.
The next screen will be asking you if you would like to have a board, map, mind map, calendar or activity.
Like everything else you will have the option to switch the other areas on later.
I would go for a board, calendar and activity for now.
After creating your new space, this is what it should look like in the ‘board’ view.
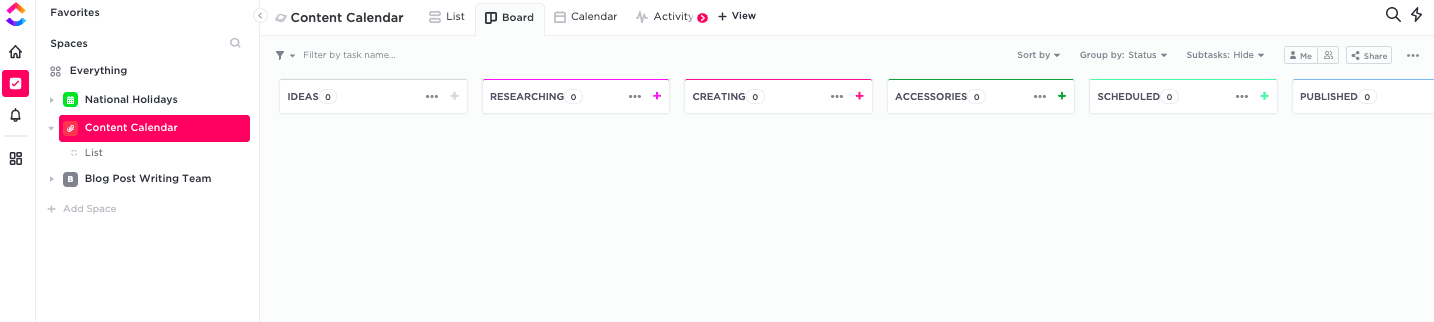
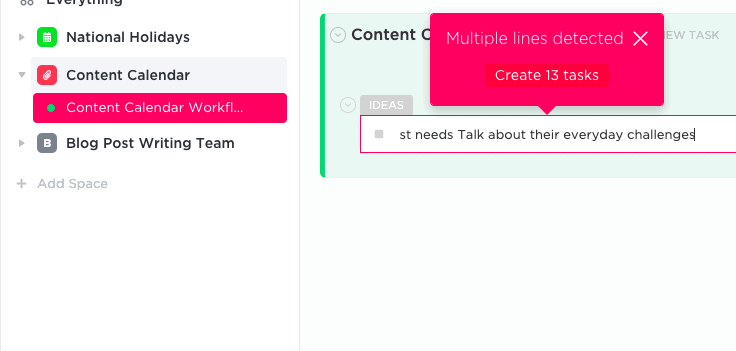
You are now ready to add your list of ideas, topics or themes to your content calendar.
If you have a big list of ideas you can simply copy them and paste them into ClickUp and it will create 13 tasks.
Step 6
After adding your list you should spend time deciding on the key elements that needs to happen in the next phase.
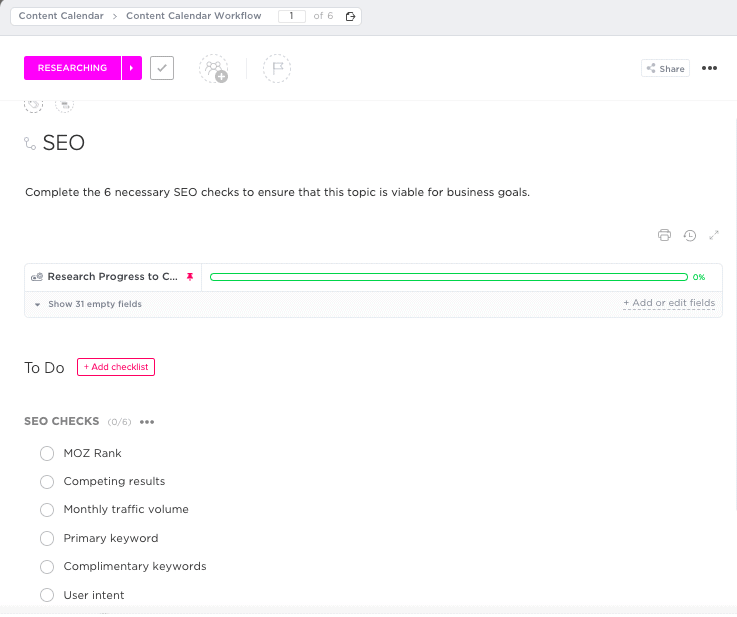
For example, my next phase is labeled as ‘researching’ because I like to spend time evaluating the topic for key elements.
These include SEO, content formats, timing relevance, CTA and return on investment.
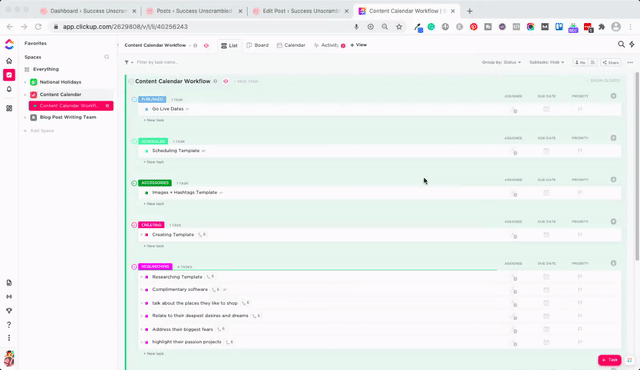
Here’s my stage two with those necessary subtasks.
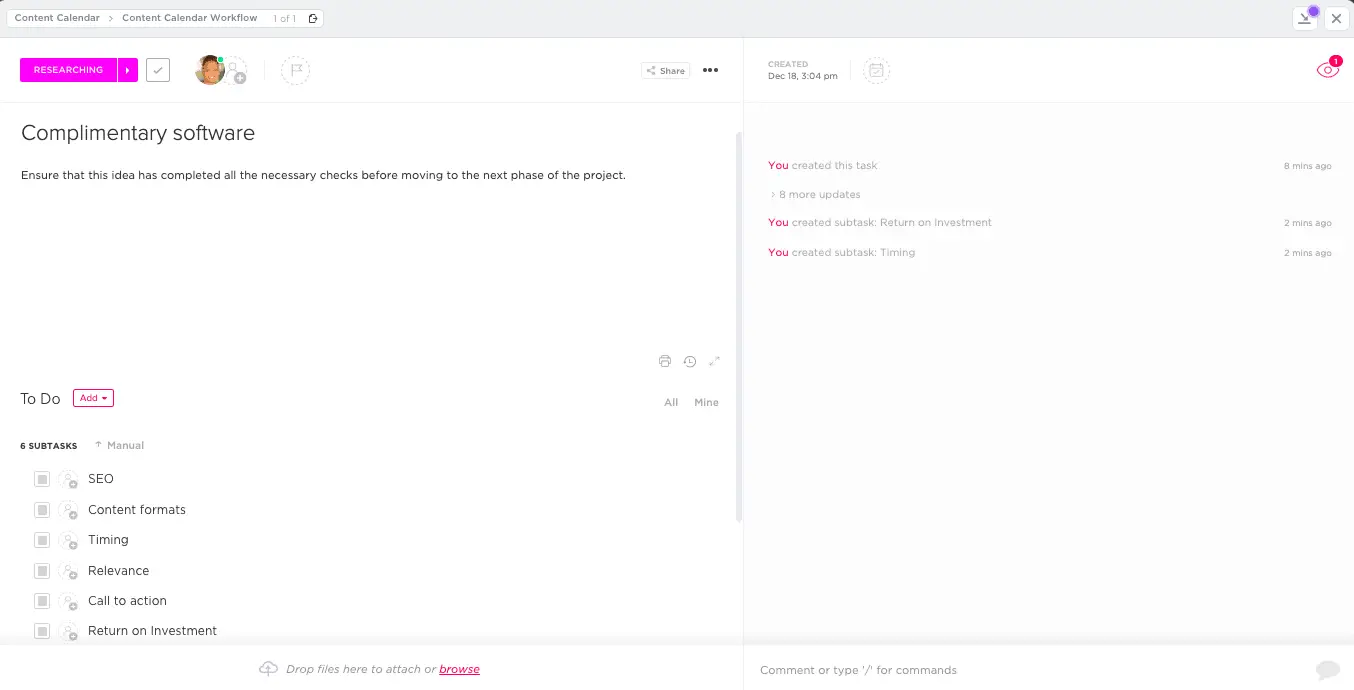
Remember to assign each person (where necessary) who needs to complete each subtask as well as a date.
Step 7
Decide if each of those subtasks needs to have its own checklist in order to reduce the risk of error.
In my content calendar I have actually taken the time to create checklists and/or custom fields that are required.
As an example, my SEO subtask has a checklist of things that needs to happen for the idea to be approved for the next phase.
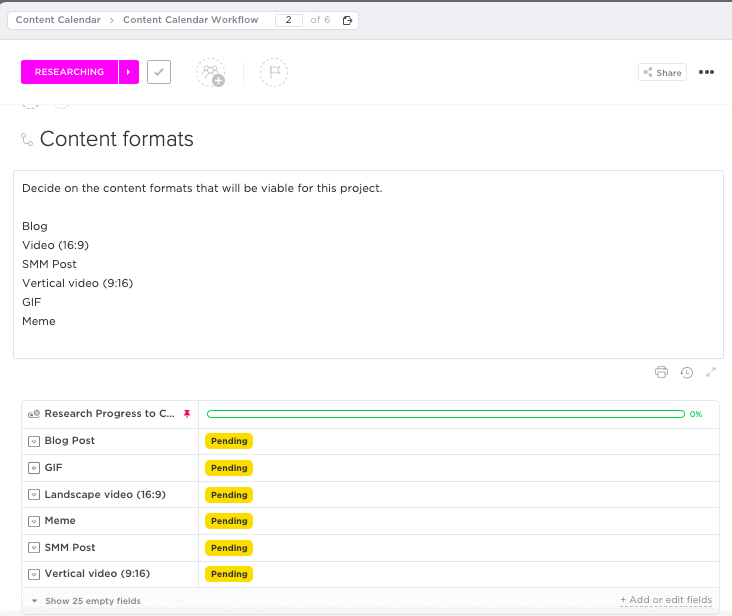
Also, the content formats subtask has a number of custom fields that I created.
This is to ensure everyone knows which formats are approved for the ideas.
Once you are happy with all the subtasks and you have all the necessary steps for this phase.
You can move on to the next one and do the same thing.
Step 8
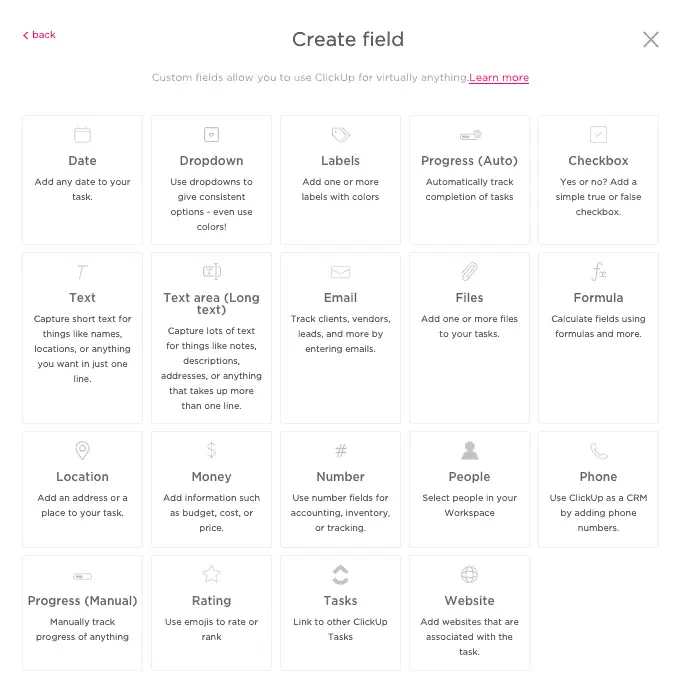
If you want to customise the options you have available for each task here’s how to create custom fields in ClickUp.
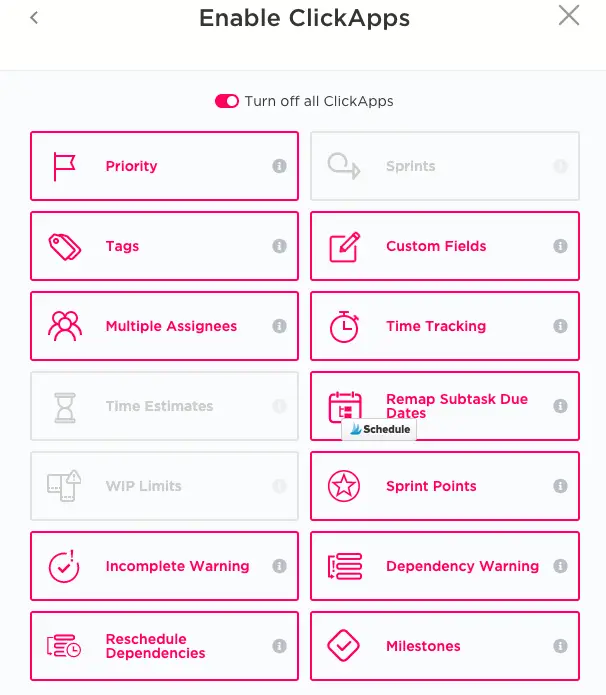
First you will need to ensure that the custom field app is enabled for your workspace.
Head over to your workspace on the bottom left corner and click on your workspace then find ClickApps on the left menu.

After choosing ClickApps on the menu you will be brought to a view that looks like this one.
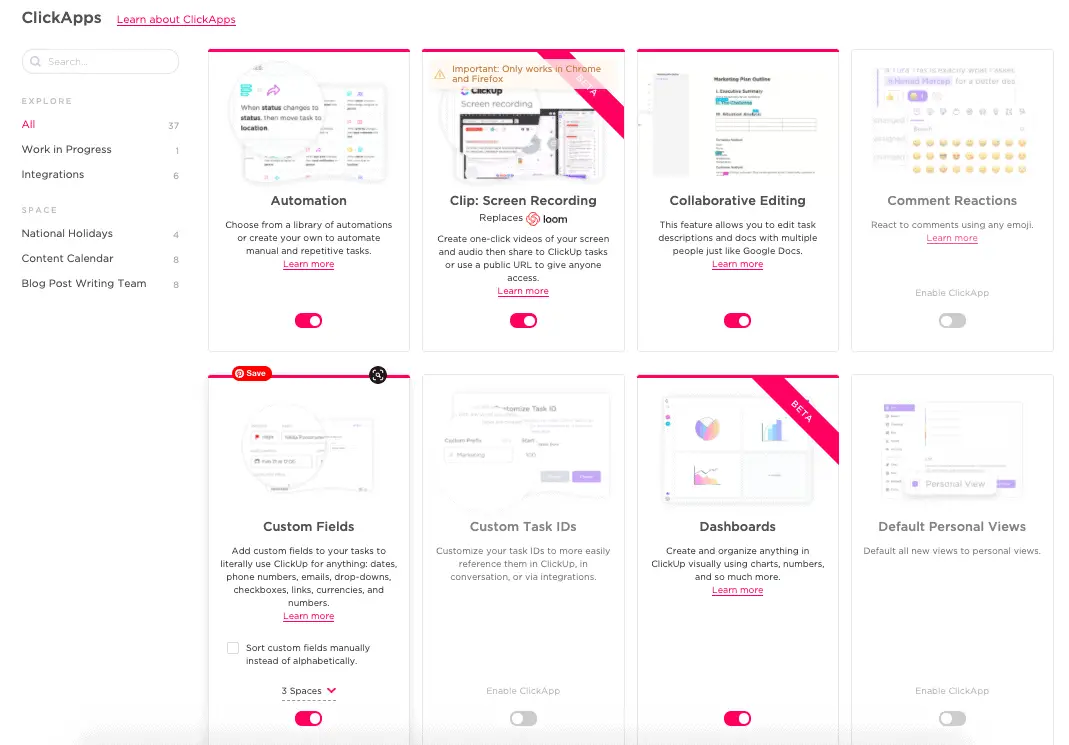
Ensure that the ‘custom fields’ option is enabled, then head back over to your content calendar.
Simply click into the task or subtask then click on the 3 dots on the top centre of that view and choose custom fields then ‘new custom field’.
You will then see these custom field options.
Step 9
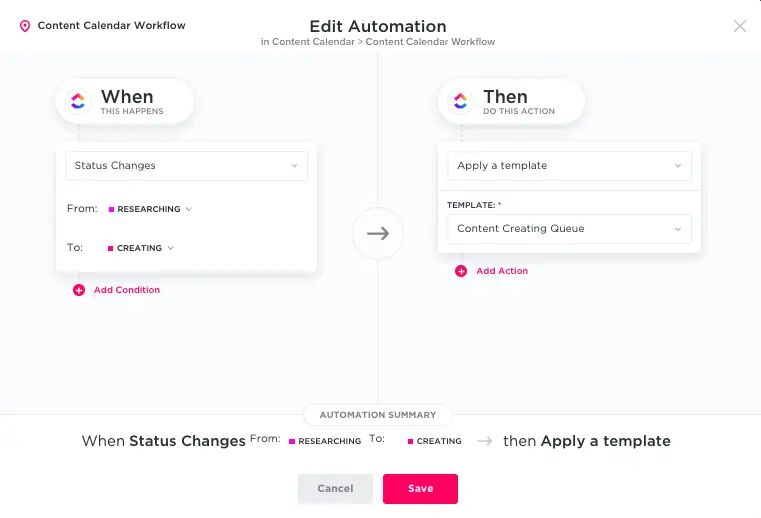
Setting up an automation is one of the best ways to get things done more efficiently in ClickUp.
To set up an automation do ensure that the ClickApp automation feature is enabled.
Head over to the list section and click on automation icon (looks like a robot’s head).
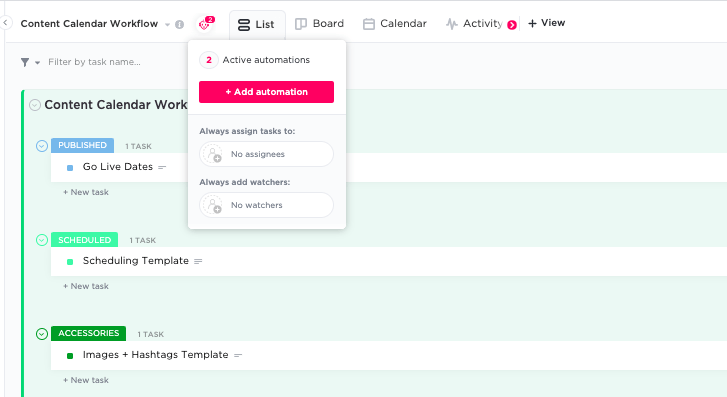
Click on the ‘add automation’ button and decide what is it that you would like to automate.
While this may sound complicated initially I can assure it is a simple “if this’, “then that” formula.
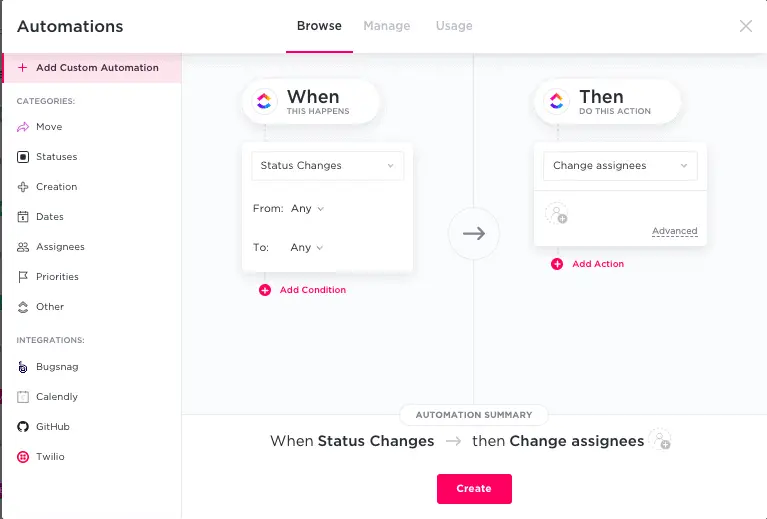
If you are not sure yet what you would like to automate just think of your content workflow and all the repetitive, manual tasks.
Here’s an example of one of the automations that I set up earlier.
Now that you have an overview of how a content calendar workflow happens in ClickUp.
Let me show you a video of how it all works as it can be complicated to explain it all in written format.
Set Up a Content Calendar in ClickUp
Click on the play button to see this overview.
After watching this video you will come to realise that creating a content calendar in ClickUp can be a straight-forward process.

Summary
Yes, not all content calendars are created equal but the ClickUp content calendar certainly is one of the best on the market.
This is because it gives you the ability to create a very customised, colourful and automated content calendar.
I have to say that I really like the fact that you can add custom fields to the tasks and subtasks.
Automations are so cool because they save you time by auto populating the tasks and subtasks with the needed information.
If you would like to get a ClickUp content calendar for your business but you just don’t have the time.
Feel free to book some time in my calendar here to discuss how I can assist you with a complete setup.
Are you struggling to come up with content ideas for your content calendar?
Or are you tired of the constant content hamster wheel?
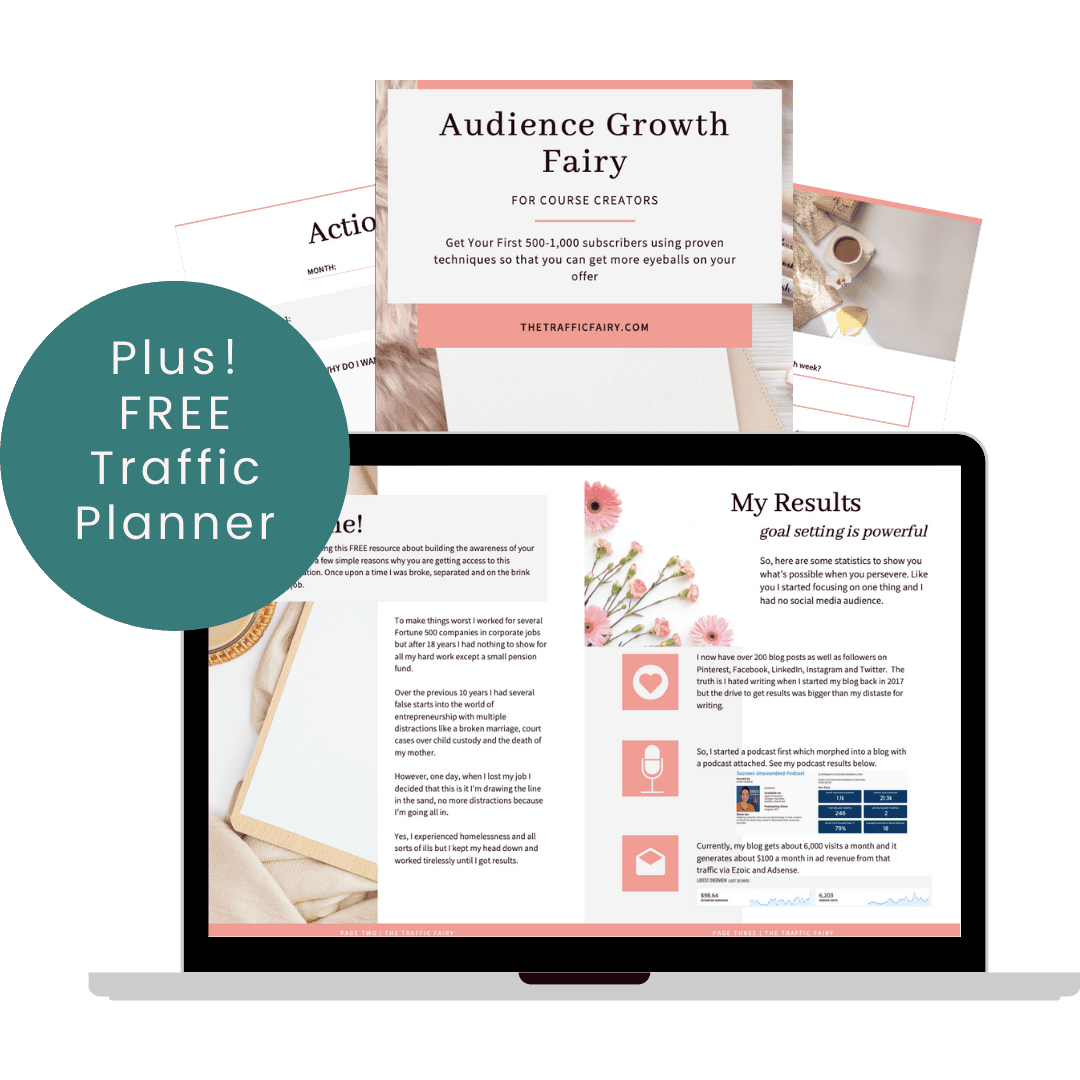
Then grab this content planning bundle that helps you to plan 90 days of content in as little as 90 minutes.
Announcements
Remember to subscribe to the Success Unscrambled podcast where you will be the first to hear what’s happening in the entrepreneurial and digital marketing world.
Your positive review of this podcast is vital to keeping it alive and running for the next 12 – 24 months so please leave a positive review for us on iTunes, Spotify or any of your favourite podcast players.
I started this blog in 2017 because I had a burden on my heart to reduce women illiteracy globally.
Because this is a huge undertaking I have decided to help 1,000 female entrepreneurs over the next 10 years to become wildly successful in their online business through simplified marketing strategies.
That way we can build a strong business network of women who can donate 1% of their profit and together we can help reduce women illiteracy worldwide.
Would you like to be part of this movement? Shoot me an email using alvern (at) successunscrambled (dot) com.
Posts Related to Making a Content Calendar with ClickUp
- Making a content calendar with Google Sheets
- A social media content plan completed in 8 hours
- Content repurposing, done the right way
- What you need to know about content marketing
- An easy blog content planner for solopreneurs


38 thoughts on “How to Make a ClickUp Content Calendar for Social Media”
I admit that many things I read on your blog are really alien topics for me, but knowing them I can improve and achieve more and more better results.
Cristina, that’s true, results are important.
I definitely need this to better schedule and have a more cohesive social media calendar. Thanks for the tips!
Adriana, you are very welcome.
I might need to do this to keep track of everything. I am trying to do better with schedules, so this will help with that.
Amber, that’s great that you are working at doing better with schedules.
Great information. I have been blogging for little less than a year and there is so much more to learn
Nishtha, welcome to blog land. Just go at your own pace.
Great tips. I definitely need to learn more and better my techniques.
Wanda, I am so glad you liked the tips.
Wow, thank you for this thorough write-up of how to use clickup! I have not heard of it yet but glad i did. A content calendar is so essential for blogging.
Leanne, you are so right. A content calendar is essential for blogging.
I’ve never been thinking of creating a content calendar for myself! I think it would be quite useful and would make my work way easier. 🙂
Natalia, making work easier is definitely one of the benefits of creating a content calendar.
that’s pretty awesome! I think it would make my life so much easier, I need to work it
Lyosha, thanks for your feedback.
I honestly have no time to plan. I get one assignment and the next. hehe So I just work on them one at a time.
Awesome Sigrid, glad to hear that you are being kept busy.
I am still fairly new to blogging so this post was very informative to me. I haven’t thought of using a content calendar but I will definitely have to reconsider now. Thank you for sharing this!
Cristina, I am so glad that you found it informative.
I definitely need something more robust to help me manage my social media content calendar. for now, I use my trusted notebook/planner.
Ivan, a notebook planner works well if you don’t need a complex solution.
Wow, that’s a very descriptive post with a good number of pictures to help. I really find adding images makes these things much easier. I wouldn’t have a clue otherwise.
Melanie, that’s hilarious, you are obviously a visual person like me.
This is a game changer. I always struggled with keeping up the classic content calendar, in Excel. I always fell behind because I simply didn’t find a smart way of making it work for me. I will definitely look more closely at the Clikcup content calendar, thanks for introducing it to me.
Joanna, I am happy to hear that the ClickUp content calendar is a very possible solution for you.
I learned so much from your other posts about creating a content calendar. This is another great and useful idea that I’ll look into.
Lisa, it is awesome to hear that you are learning so much from my other posts.
Thanks for sharing these awesome tips! I need to schedule my contents too for better improvements.
Blair, you are very welcome.
The click up content calendar sounds like a great tool with a lot of advantages. I use one but have not utilized all the options available yet.
Kelli, great to hear that you are using a content calendar
I definitely need to follow your tips which will be so beneficial for me. Thanks for sharing.
Marjie, I am glad that you found the tips beneficial.
I feel like I was overloaded with information! Haha! I need to read this back and forth to absorb the ideas and information. I hope I could finally grasp this and learn about this topic.
Anosa, I’m so sorry that the information left you overloaded, maybe take a look at the video for the short version.
A social media calendar would be very helpful for me, much better than notes on post-its!
Cindy, you are right. It is definitely much better than notes on Post-its.
Comments are closed.