Podcast: Play in new window | Download (Duration: 38:23 — 53.4MB) | Embed
Subscribe: Spotify | Amazon Music | Email | TuneIn | Deezer | RSS | More
Are you looking for a way to record a podcast on a Mac computer?
If you are new to podcasting or just looking for other options to record a podcast quickly and efficiently I feel your pain.
It’s been over 3 years since I started my podcast and at the time there weren’t many resources available.
When it comes to podcasting you’ll realise there’s so much to learn.
To be frank, there are many layers to consider in the podcasting realm.
Here’s a short run down for you.
What topic will you choose for your next episode?
Will it be in a solo format or interview or group discussion?
Do you have the best tools to do the recording?
Where will you record the episode?
If you are not doing a solo show, do your guests have the right software, equipment and broadband connection?
As you can see there are so many things to consider when you need to produce a podcast show.
In this post, you’ll learn what software you can use to record a podcast on Apple computers as well as what else you need to consider for a good quality audio recording.
Podcast Equipment Statistics
Before diving into the information about recording your show, it would make sense to look at podcasting equipment statistics.
In other words, what other podcasters in the industry are using when it comes to creating, editing and publishing their show.
Doing this will help you gain insights into which equipment is popular.
While there are a lot of statistics available about podcast listeners.
Very few seem to be interested in surveying the podcasters.
Let’s first look at the top microphone brands according to the folks at The Podcast Host.
- Rode – 19%
- Blue – 17%
- Shure – 12%
- Audio Technica – 11%
- Samson – 7%
- Zoom – 5%
What was interesting about the survey they did is the number of people using recording software.
Of the people surveyed, 67% used software, 25% used a digital recorder and another 4% fell into the category of other.
On the topic of microphone types, there were 3 in the results. A dynamic mic at 35%, a condenser mic at 29% and a USB mic at 33%.
Do you record podcasts with headphones on? Now, I believe that the results are a bit skewed here.
Because 74% said yes and 26% said no. The reason why I believe it is not accurate is that I record mine with ear pods.
I do it not to hear my voice but to record into the Apple ear pod mic.
Podcasting Equipment for Good Quality Sound
Now that you know what other people in the industry are using let’s look at the layers of necessary equipment.
I’ll try to cover everything for recording and not for post-production.
Some of the equipment used in the recording stage can also be used during podcast production.
Here’s a list of what you may need.
- Clear voice
- Microphone or EarPods
- Digital Audio Workstation (DAW)
- Storage for audio clips
- Stable broadband connection
- Pop filter
- A quiet room
- Topic for recording
- Uninterrupted recording time
- DAW for multitrack recording (if not solo)
- A plan
Clear voice
When I first started recording my episodes I took this aspect for granted. If you’ve been podcasting for a while you’ll know that the minute you catch a cold it’s time to panic.
Because it is difficult to do an audio recording when your throat is sore or your voice is not clear.
Fun fact, I recorded a couple of episodes from my hospital bed just after surgery because I wanted to give my listeners first-hand information.
Microphone or EarPods
One of the first things everyone who is starting a podcast wants to know is what’s the best microphone for podcasting.
The funny thing is that new podcasters don’t really need a good microphone. Your Apple EarPods works just fine.
You can have the best microphone in the world but if your DAW isn’t good or your environment is not right the audio recording quality will not be good.
If you can afford a microphone then go ahead and get a USB microphone but don’t let it stop you from starting a podcast.
Based on my research a condenser microphone seems to be the best option.
Digital Audio Workstation (DAW)
Finding a DAW that will work for you can be a difficult task. I have used the following over the course of almost 4 years.
- Blog Talk Radio
- Spreaker
- Quicktime
- Audacity
- Anchor FM
- GarageBand
- Zoom
- Skype
- Zencastr
As you can see, it really depends on your situation. The road to finding a DAW was not an easy one for me.
It could be a lot easier for you because you can learn from my mistakes.
Storage for MP3 files
After working diligently to record your episodes remember to figure out where you want to store your audio files.
Initially, I stored them on my hard drive until I ran out of space.
However, my advice for you is to use an external hard drive or Google drive because storing them on your hard drive will slow down your computer.
A Stable Broadband Connection
While this doesn’t sound like something to be worried about let me tell you why it matters.
If your DAW is online then you’ll need a stable Internet connection.
Have you got plans in place to interview guests? If so, then your worst nightmare would be if either of you get disconnected during the call.
Pop Filter
In case the word pop filter is not familiar to you, it is just a device you place in front of your microphone.
It is useful for softening the sound of Ps and Ts.
Without it, your audio recording might sound harsh in some areas. Yes, you can edit it but trust me when I say it is better to do it right during the recording stage.
A Quiet Room
I giggle while I am writing this resource because I’ve seen so many creative ‘quiet rooms’.
Many podcasters have created recording spaces in their closets.
Your room not only needs to be quiet but having soft furnishings will really help reduce echoes.
Topic of discussion
While ad libbing may sound very attractive, I can tell you from experience you are better off preparing in advance.
This is because improvising from start to finish can leave you tripping on your words and rambling a lot.
A well prepared episode will help you plan for several episodes in advance.
Uninterrupted recording time
At this point, I can tell you about a few times when the phone or door bell rang in the middle of a recording.
Yes, this can happen from time to time which means you’ll need to stop and start back where you left off.
If ever you decide to record on your phone, put it on airplane mode and switch on the wifi.
DAW for Multitrack shows
When you decide to have guests on your show you’ll notice that it adds another level of complication.
This is because you’ll need to find a DAW that can record both of you at the same time but on separate tracks.
You’ll need a multitrack DAW that is simple to use so that your guests don’t get lost in the technology.
A plan
The very first 5-10 or even 20 episodes will feel a little bit awkward as you find your groove.
What do you say at the start? How will you address your audience?
Will you use intro music? Do you have a strategy for your topics?
While it all sounds stressful, you’ll get it all figured out with time.
Finding the Best DAW
As I mentioned previously finding the best DAW for your needs can be a little bit tricky.
This is because not all the DAW software are created equal.
Here is a list of things that make a DAW good for podcast recording.
- Can record a solo episode
- Ability to record guest interviews
- Records audio without background noises
- The recording is clean without static noises and hissing or buzzing
- Unlimited recording length or at least a minimum of 30 minutes
- Saved format of MP3 or WAV
- Gives you the ability to easily download your recording
Let’s spend some time looking at the ones I used as well as the pros and cons of each platform.
Zencastr
When it was time for me to record my first podcast interview I was a little concerned because I didn’t know what to use.
Zencastr looked like a great option so I went with that for my first and second interviews.
This was 3 years ago and the experience wasn’t great. I’m sure the technology has improved since then.
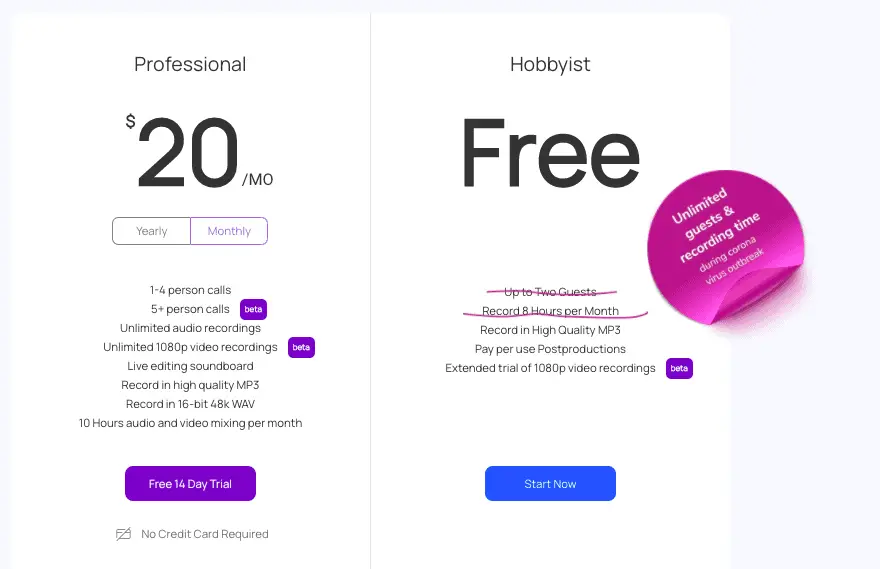
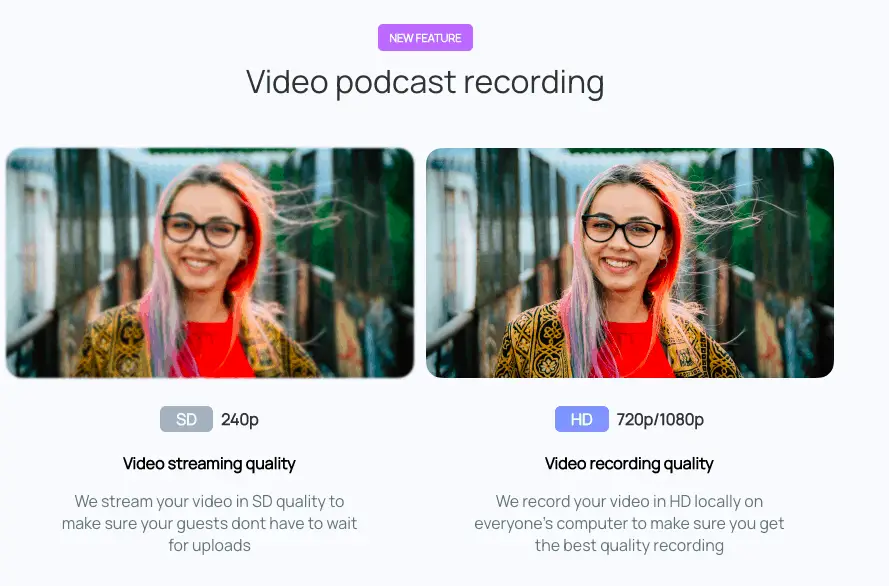
They have a free plan that allows you to record in high quality MP3 so give it a try to see if you like it.
There’s also a new feature where they can do video podcast recordings which is brilliant.
Blog Talk Radio
For my third podcast interview, I decided to try BlogTalk Radio. I have to say it is not a good idea to try new technology for interviews.
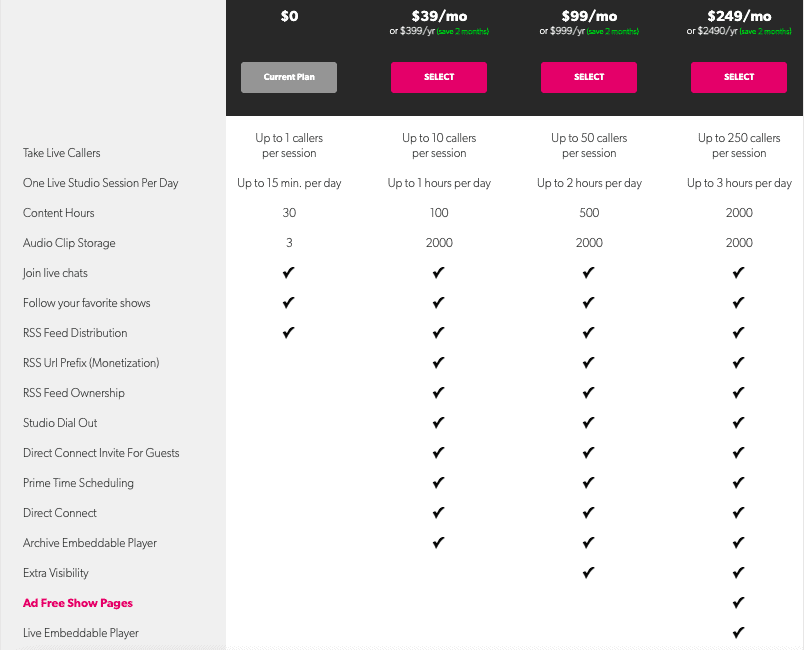
I guess you can think of it as a service that is similar to Clubhouse where listeners and participants don’t need to be members.
Here’s a screenshot of the dashboard to help you understand the platform better.
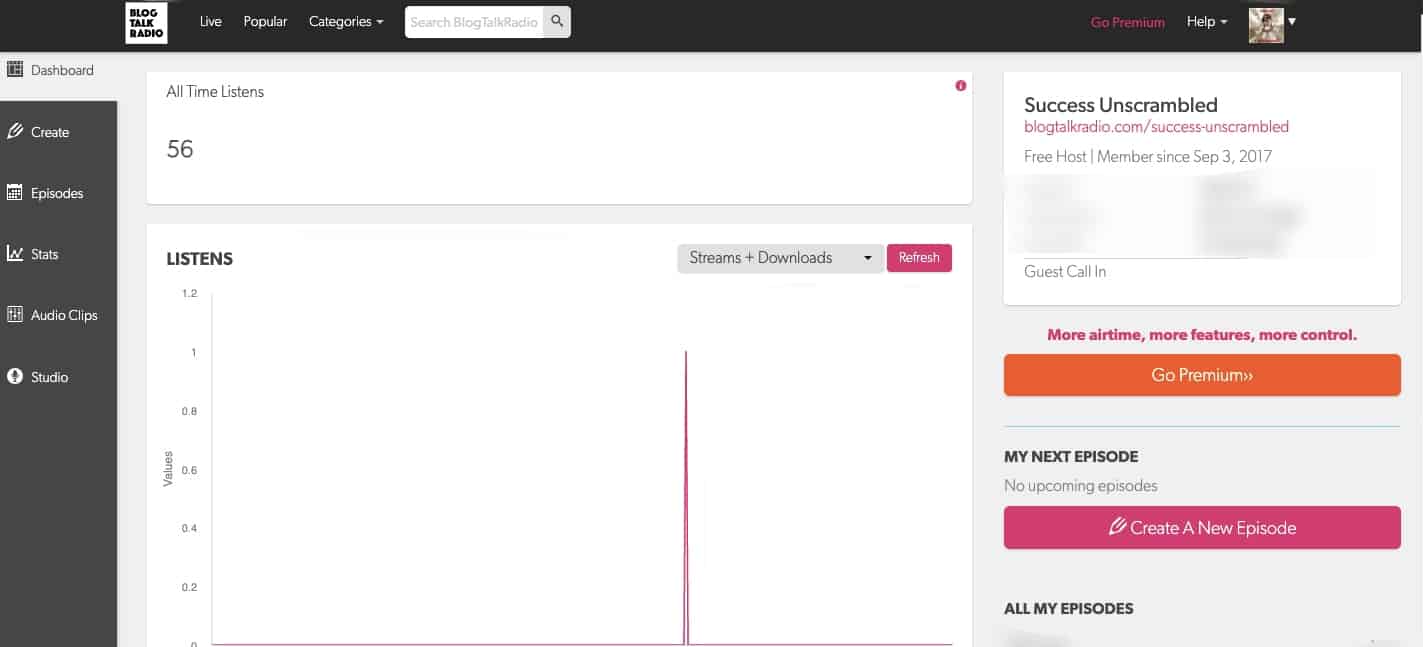
You are better off doing a trial run with a close family member before doing it for real.
It has a very professional feel to it but it is ideal for live shows.
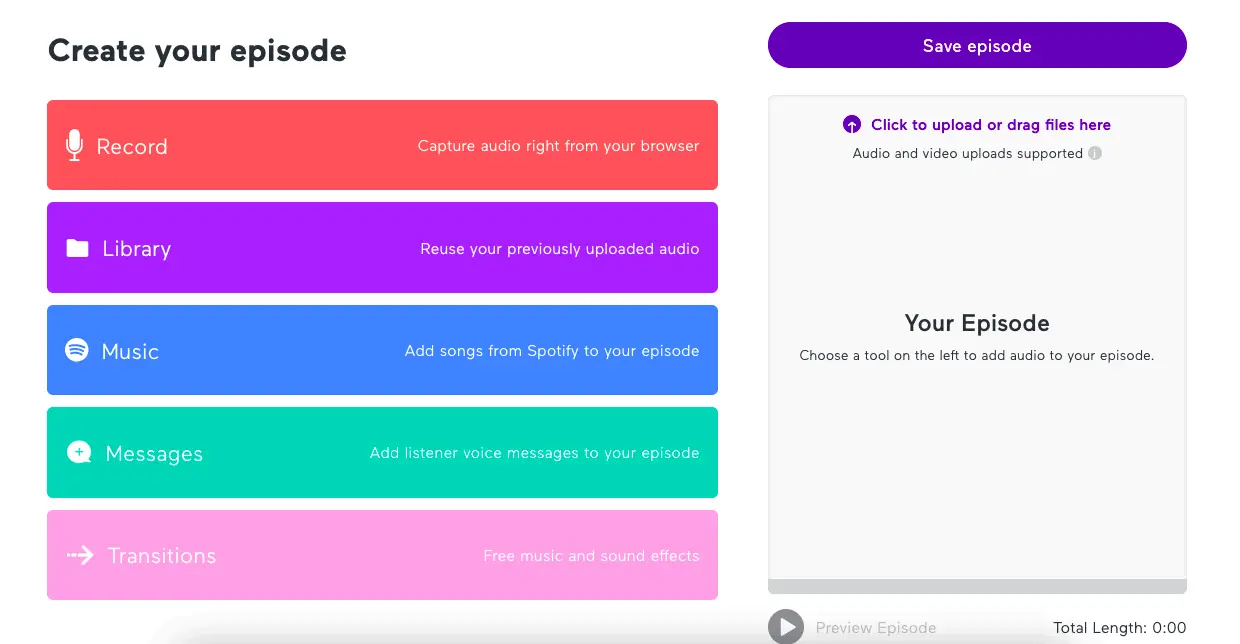
Spreaker
I think Spreaker was the next one on the list for me to try out. Simply because they have a mobile and desktop app which is great.
What really attracted me to Spreaker is the fact that you can do guest interviews seamlessly.
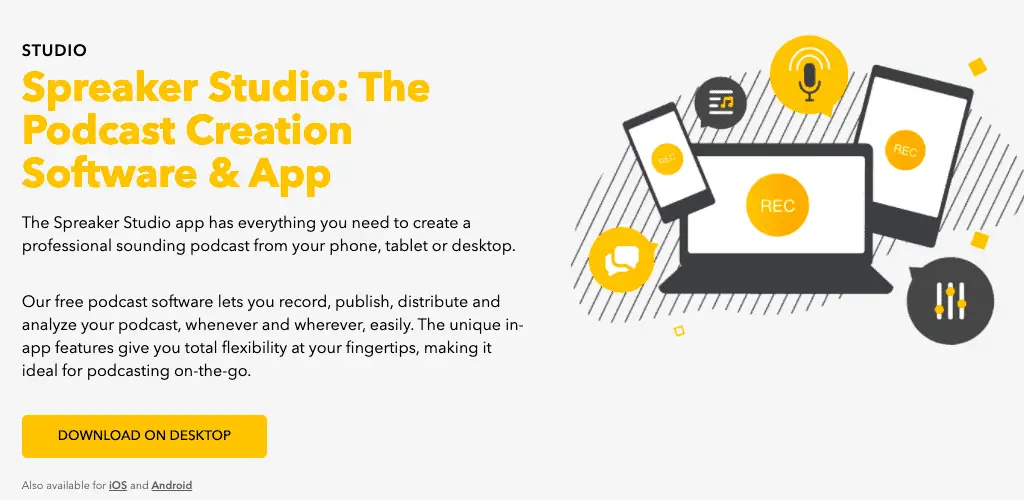
Simply download the Spreaker Studio desktop app and log into your Spreaker account.
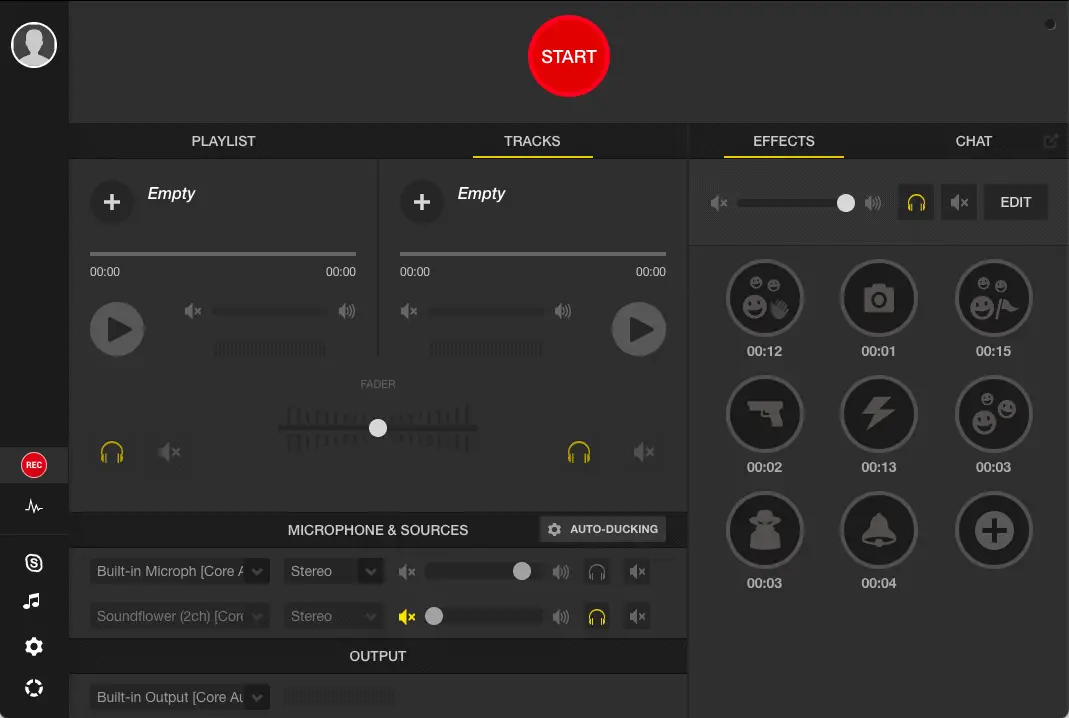
As you can see in the recording studio there are several features available like integration with Skype and sound effects.
I stopped using Spreaker because at the time there wasn’t a low-cost version plus I was already using another podcasting host.
Quicktime
At some point I wanted to try out local desktop solutions.
So, I decided to give Quicktime a try for many episodes. The challenge with the Quicktime player is that there was always a hissing noise with each recording.
It is possible that this could have been solved with a high-tech external microphone but I cannot say for sure.

There really isn’t a lot of fancy features available with Quicktime. Simply click on new audio recording, choose your microphone and click the red button.
GarageBand
If you are a Mac user, you’ll know that GarageBand comes out of the box on your laptop or desktop as standard.
I deleted it off my Mac because it is a whopping 800MB in size so it does hoard a lot of storage space.
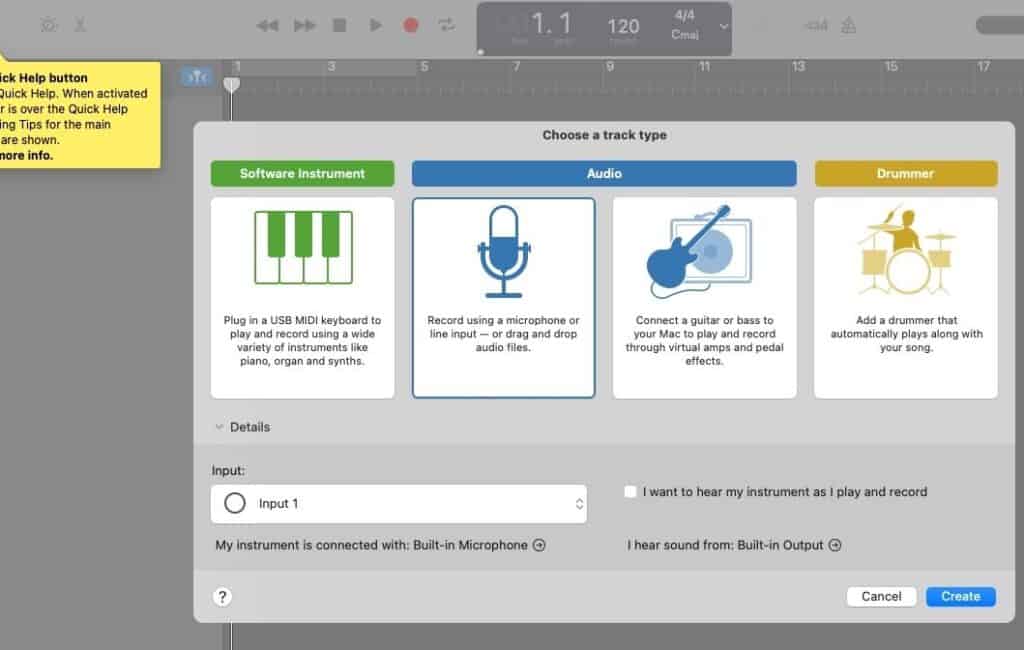
You can see that GarageBand is really designed for music production as it comes with so many cool features and devours a lot of storage.
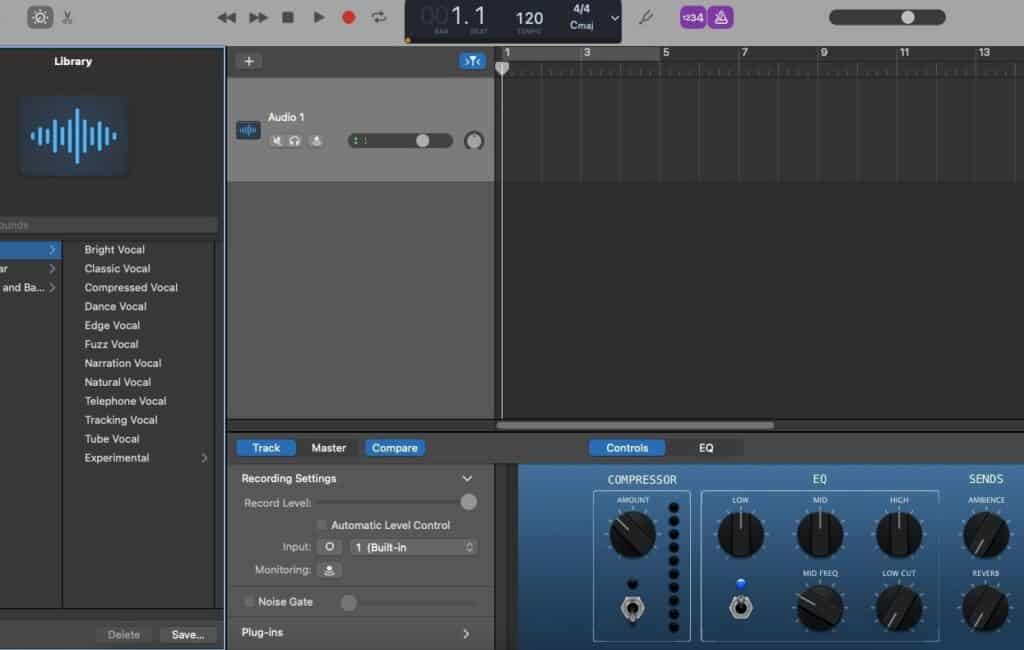
Audio files created on GarageBand can also be 100s of megabytes in size. To give you a frame of reference a standard 30-minute audio recording should be 25-50MB in size.
Audacity
Another desktop app that has given me nothing but trouble is Audacity.
So many people recommend this audio studio to record and edit podcasts.
However, no matter how many times I’ve tried and how many training sessions I have taken, it doesn’t work for me.
One curious aspect of Audacity is that it leaves hundreds of tiny files on my hard drive whenever I install it on my laptop.
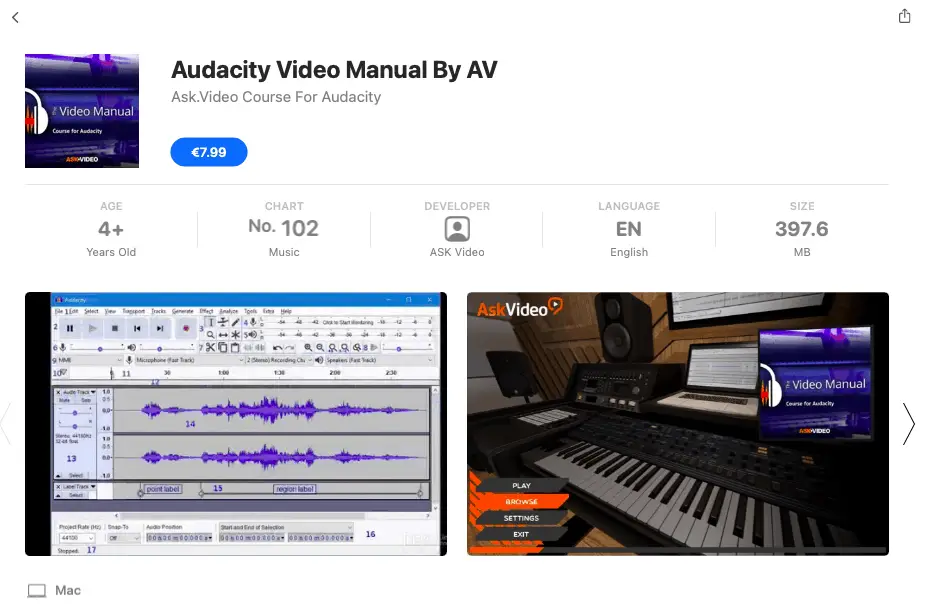
There’s a video course for Audacity on the app store. I am not saying don’t use it for your podcast.
Who knows, you may be lucky enough to get it to work.
Skype
A few years ago when Skype was free, I used it to record a few podcast episodes that were interviews.
In case you’re wondering how to get this done, let me explain.
There’s a software called Ecamm call recorder for Skype that will record your podcast interviews for you.
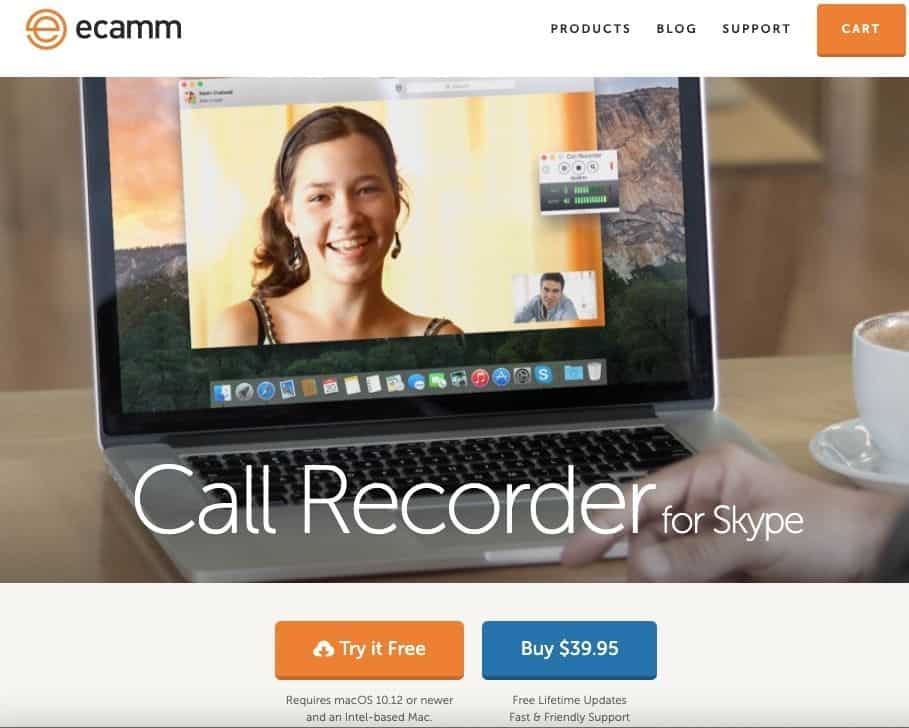
It records both mp3 and mp4 versions of the call. A lifetime license is only $40 which is brilliant.
However, Skype is no longer free to use so you’ll need to consider if this is a viable option for your business.
Zoom
As someone who runs a service-based business, you’ll find that you already have a pro license of Zoom which is $15 a month.
So, using Zoom to record your podcast episodes is a great option.
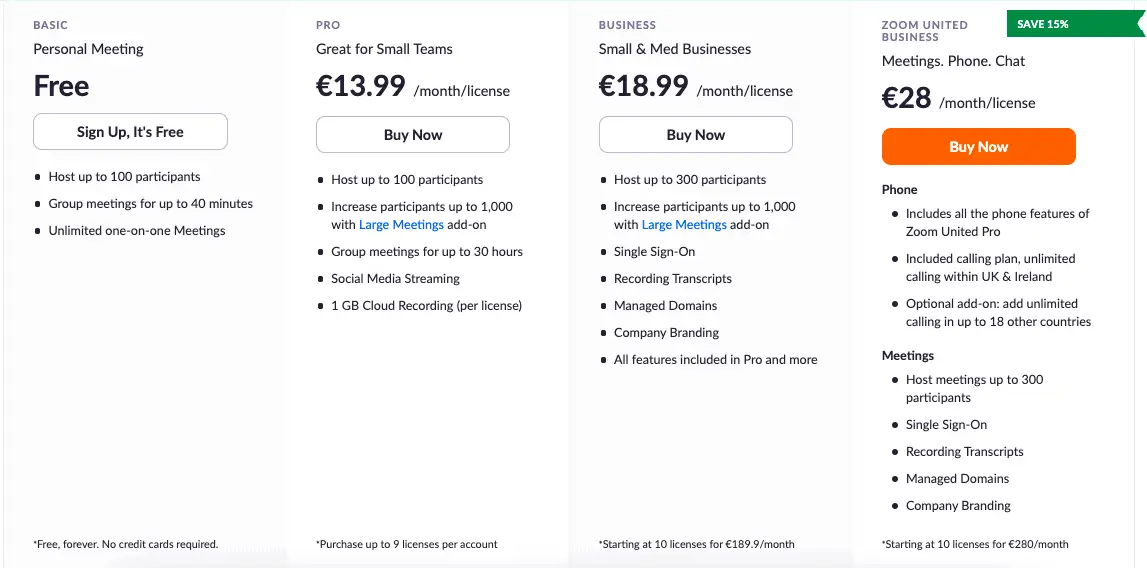
Except for the fact of doing solo episodes which can feel a little bit weird.
It really is a handy and cost efficient way to record your audio podcast interviews.
Anchor FM
After lots of trial and error and over 150 podcast episodes I decided to use Podcast FM.
It’s free to use and the resulting recorded audio is clean.
What I mean is that there is no hissing, static noises or other background noises in the recording.
Best of all Anchor FM is owned by Spotify and it is free to use.
Yes, there are a few disadvantages.
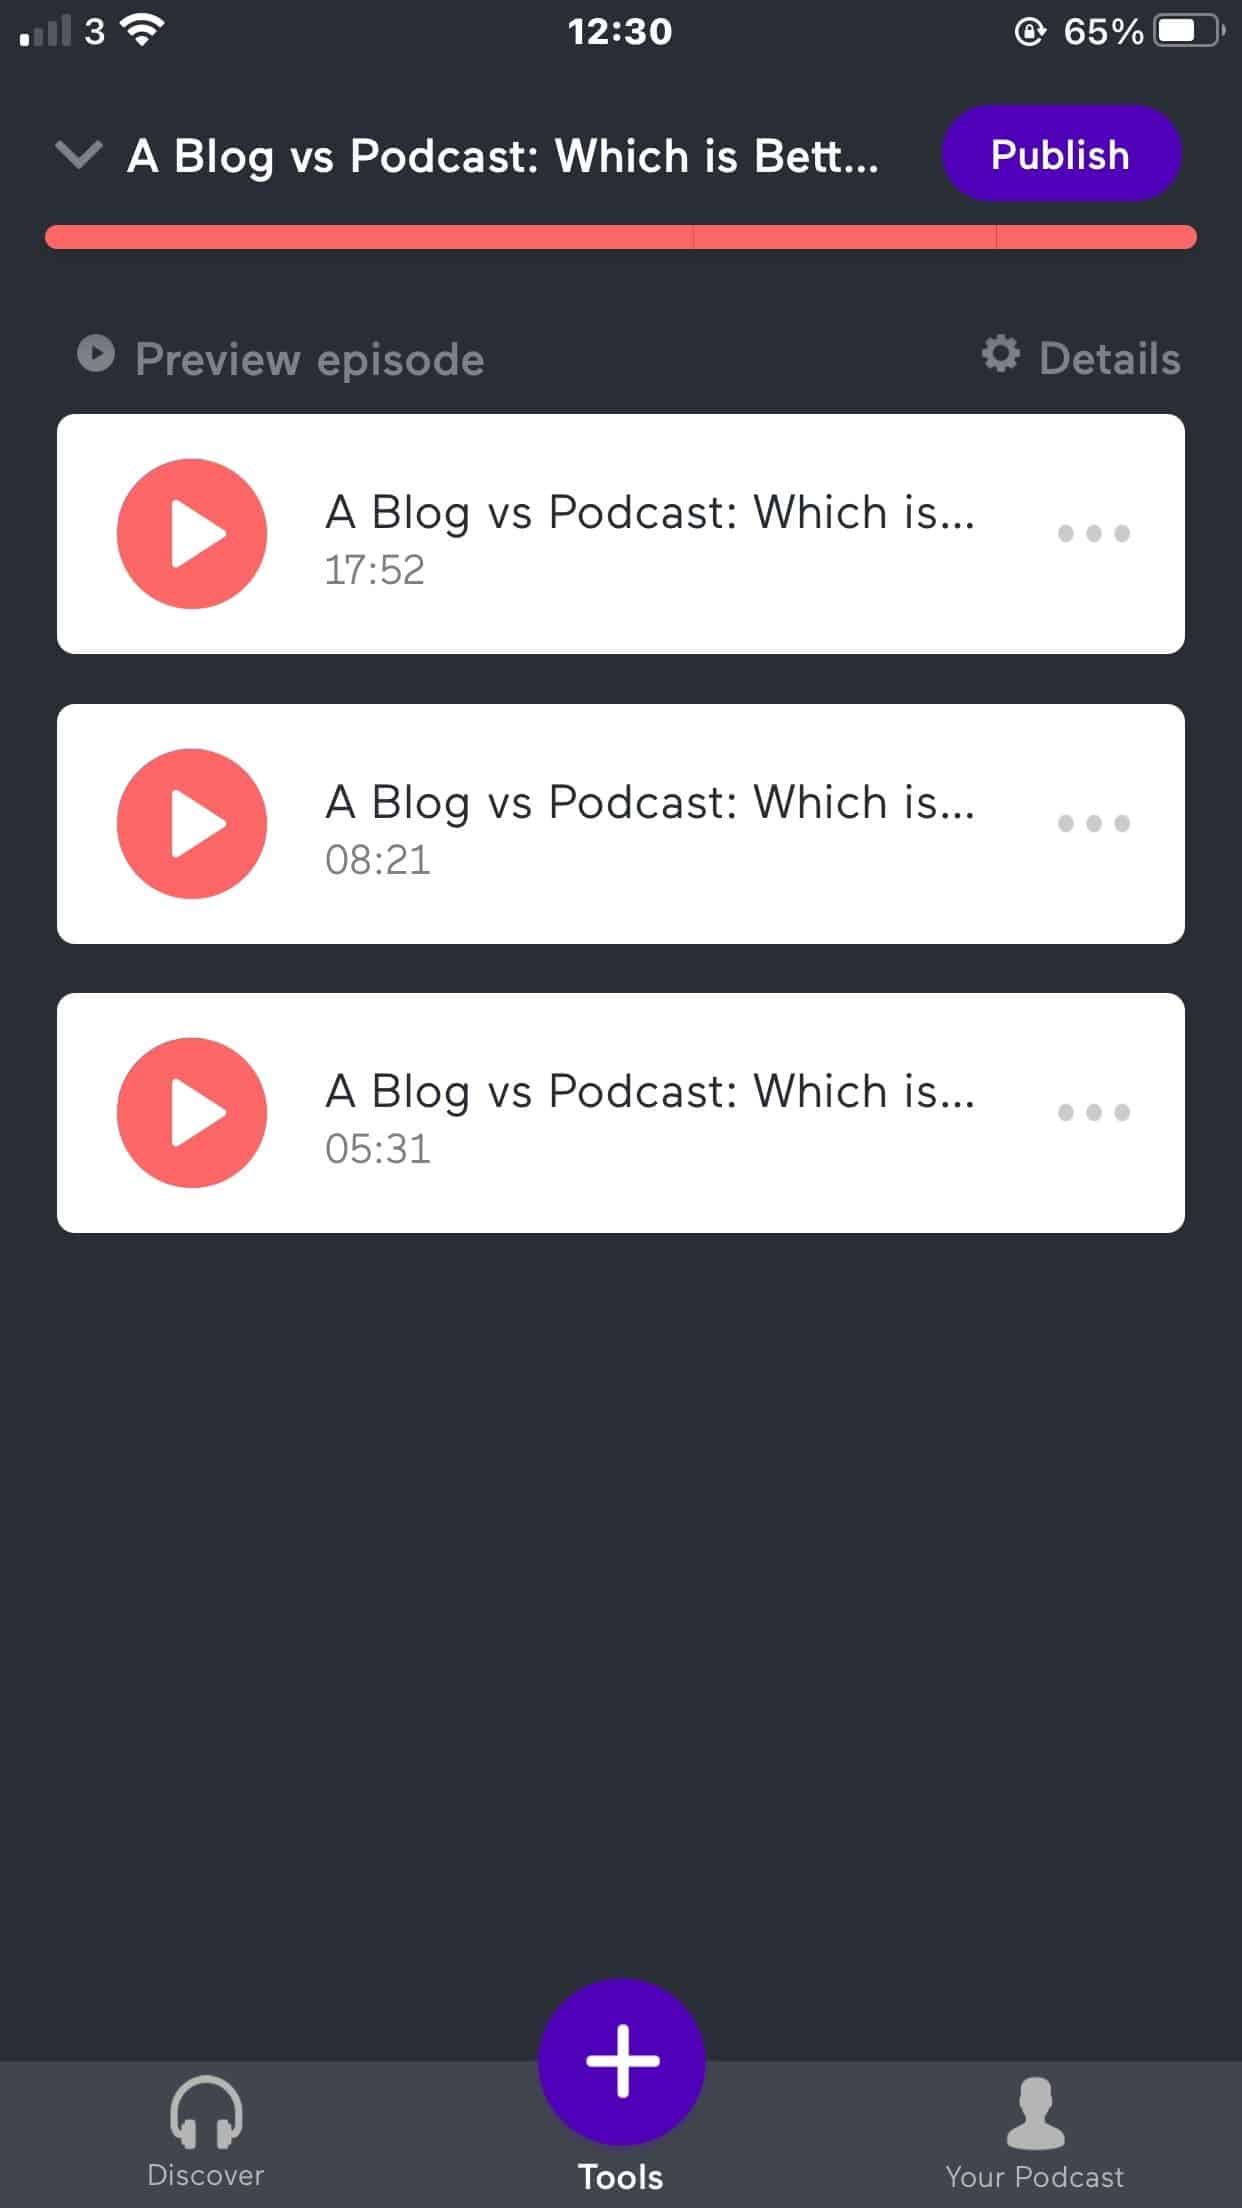
You can only record an episode up to 30 minutes long. If it is longer you’ll need to stop and continue from where you left off.
There’s a mobile app available to record guest interviews and you can go past the 30 minute limit.
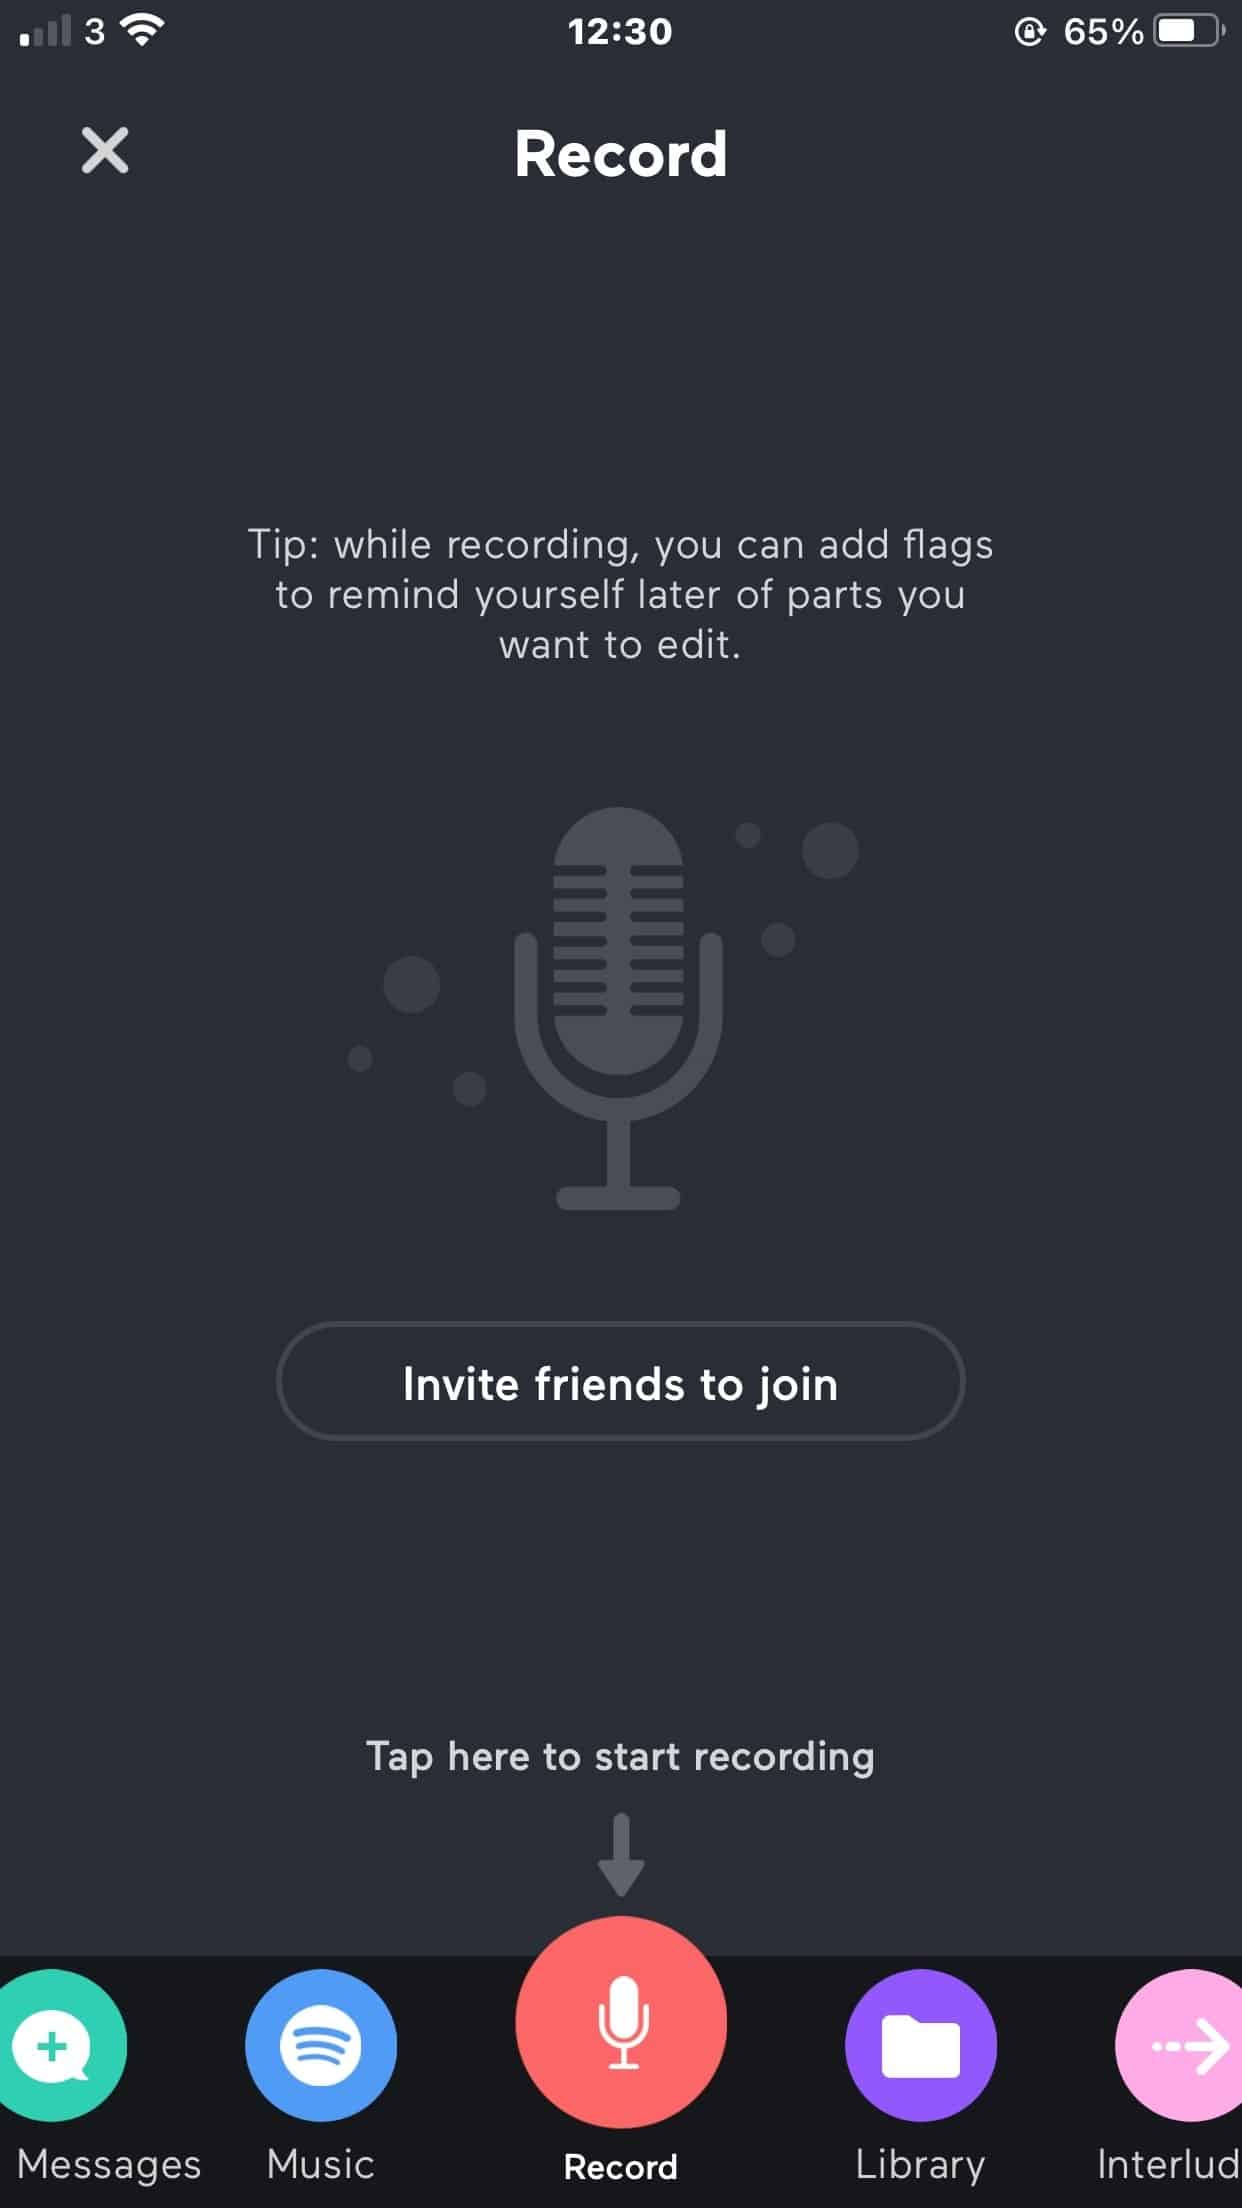
The one issue with the mobile app version of Anchor FM is that it’s not clean or studio quality.
One of the advanced features of using Anchor FM is that you can use music from your Spotify account in your own podcast episodes.
Other Apps to Consider as DAWs
While I haven’t tried every app on the planet, there are still a few applications that I would like to try out.
Because technology in the podcasting space keeps improving so I’m always open to look at a better DAW.
The podcast recording apps on my wish list include:
- Ecamm Live
- Podcast Studio (it kept crashing when I did a short trial)
- Alitu
- Steamyard (I used it to go live on FB and YouTube already)
- Resonate free online voice recorder
- Descript (used it to create audiograms and transcripts)
- Adobe Audition (steep learning curve)
Feel free to give them a try for yourself to see if any of them is suitable for your podcast recording needs.
The Ideal Recording Setup
You have all the items you need to record your podcast but what does an ideal setup look like?
Just in case you’re wondering, I don’t have a specific home studio only my Macbook Air and EarPods.
If you are on a laptop then you’ll want to have it placed on a flat service without any humming noises.
As a Mac user there are certain times when the fan makes noise for a period of time.
What I do is shut it down for 30 seconds and power it back up.
Ensure that the room that you’re recording in is not empty otherwise the recording will be full of an echo sound.
To absorb excess sound use a room with curtains, a bed with linen, a sofa with cushions, carpeted floors, etc.
Stay away from appliances that make a humming noise like fridges, freezer, washing machines and anything like that kind of equipment.
If you have pets like dogs, birds or ducks be mindful of them interrupting the show.
Have your notes, water, a pen and anything else you find necessary nearby before hitting the record button.
Approach it with the best attitude so that your mood comes across during the recording.
How to Record a Podcast on a Mac
Now that you have all the tools that you need to record a podcast episode let me show you the steps I take to record one.
What works really well for me is if I plan a series of topics in advance, like 4-8 weeks.
The reason for this is that I am able to think of what I want to discuss on the show long before I record it.
There are two ways that I find work well. These include writing out the show notes in advance or having a pre-written outline of the show to hand.
As I mentioned previously, I don’t have a professional podcasting microphone so I just use my Apple EarPods (wired).
99% of the time I record using my laptop and my show notes and outline are on the screen.
Here’s what I have with me when it is time to record an episode.
- Show notes
- Apple EarPods
- Anchor FM (logged and ready to hit record)
- Intro line
- All background noises switched off (washing machine, emails)
- Phone on silent or aeroplane mode
- Glass of water
- A stable broadband connection
If you are using a DAW for the first time, I suggest that you record 1-5 minutes of your episode and stop.
Listen to the recording, to check and see if there are any static, buzzing or background noises.
In case there’s hissing, static or buzzing, try different EarPods, microphone or DAW until you find one that produces clean audio.
Recording 30-60 Minutes of Audio
One of the things that you probably never thought about is the length of time it can take to record a piece of audio.
You can get tired during the recording. Also, your voice will not be used to this experience so you may start coughing right in the middle.
Advise your guests to relax and have water to hand as well.
Remember you can edit out areas where errors occur so don’t panic.
Step 1
Log into your DAW (Anchor FM), click on new episode and choose record.
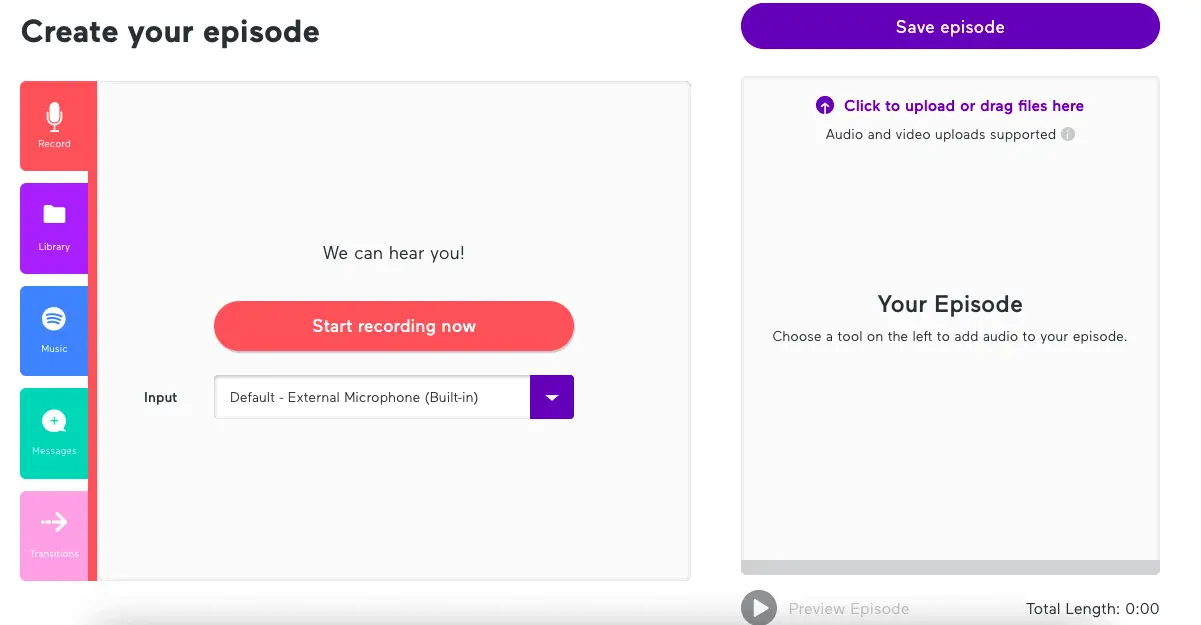
Ensure that the input has the correct microphone selected.
Step 2
Get your show notes or outline ready for the recording. This can be on paper or onscreen.
Add cues or highlight areas of emphasis and have a pen and paper to hand.
Step 3
Ensure that you are connected directly to your broadband connection or sit as close as possible to the router.
Have a plan B broadband connection if your WiFi is known to have issues.
Step 4
Lubricate your voice with water an hour or so before you hit the record button. Empty your bladder 5 minutes before the recording.
Have a glass of water nearby in case you need it.
Step 5
Do a test run in your head or out loud of the start and first few paragraphs of the episode.
Also, practice what you’ll say at the end.
Step 6
Ensure anything or anyone that has the potential to cause background noises are switched off, settled or silenced.
Kitchen appliances have cycles so you can time these to record at quieter times.
Step 7
Visualise yourself recording the podcast and in your mind see that one person in the audience who will be listening to the recording.
Do a few warm up exercises that will put you in a mood that’ll make the show sound lively.
Step 8
Pop the EarPods in your ears or the microphone in front of you practice flicking between screens if the intro and show notes are in different views.
Take one last sip of water, smile, bring on the energy and hit the red record button.
Breathe, say your first few lines, settle into the groove and continue recording until the end.
When you’re finished click the stop button.
Key Take-Aways Post Recording
If you made mistakes during the recording, make a note of where those mistakes occurred.
Try to leave a long pause after the mistake so that you can identify it easily during post production or editing.
When you make a mistake be sure to re-record a clean version of that phrase or sentence after the pause.
Even if the recording was a bit lower in volume than you expected it is okay because you can use an audio leveller to increase the volume.
Practicing difficult words before recording can stop you from tripping up.
It may make sense to do a test run of the guest interview 24 hours before the recording.
This is especially helpful if your guest is nervous about technology.
You don’t have to say the same thing at the start of each episode, feel free to switch things up.
Sometimes you may find yourself needing to record an episode in 2-3 different parts and that’s fine.
Just ensure that all the parts are clean audio recordings that you can join together.
Summary
Recording a podcast on Mac or any device can be very exciting no matter how ofter you do it.
It may take you time to find the perfect DAW that is within your budget.
Or even one that is suitable to the way you like to record.
As you saw in my 3+ years of recording podcast shows I used several before I settle on one.
The truth is that I may change again in the future if a better one is available.
While everyone is driving themselves crazy about purchasing the best microphone.
Remember that you don’t need a professional setup to start recording a podcast.
Spend time focusing on the needs of your audience as it will help guide you in the creation process.
If the files you create are over 50MB think of how difficult it might be for your listeners to download that file.
Frequently Asked Questions
Anchor FM is an online podcast recording application so it should work well on Mac and PC too.
Ensure that the audio being recorded is clean. Which means it is free of buzzing, static, hissing and background noises in your environment?
You’ll need to use soft furnishings like curtains, cushions, bed linen, rugs and pillows to absorb that extra noise.
No, depending on the quality of the recording it can cost you between $80 and $350 per episode to get it cleaned. So, it makes more sense to have clean audio recorded.
This can be adjusted using a sound leveller like Auphonic.
Yes, you can take a look at how to start a podcast here.
Take a look at the blog vs podcast comparison here.
Apart from Spreaker and Anchor FM, you check out this handy podcast hosting resource here.
There are a few platforms that can help with podcast editing like Zencastr, Podcast Studio, Alitu and Reaper for DIY editing.
If you want to outsource this to someone consider using Resonate Production or this Podcast Management service.
Never go with the popular option blindly, always do a free trial of the hosting, DAWs and editing software.
Because it will capture the sound of everything in the area including the computer fan, any background noise and there’ll be buzzing, static and hissing.
Announcement
Remember to subscribe to the Success Unscrambled podcast where you will be the first to hear what’s happening in the entrepreneurial and digital marketing world.
Your positive review of this podcast is vital to keeping it alive and running for the next 12 – 24 months so please leave a positive 5-star review for us on iTunes, Spotify or any of your favourite podcast players.
The one thing that will save you hours of podcast editing is recording a clean episode that’s industry-standard each and every time.
While this may sound simple, the easiest way to accomplish this is testing the DAWs on the market to find the best one for you.
I started this blog in 2017 because I had a burden on my heart to reduce women illiteracy globally.
Because this is a huge undertaking I have decided to help 1,000 women over the next 10 years to become wildly successful in their online business through simplified marketing strategies.
That way we can build a strong business network of women who can donate 1% of their profit and together we can help reduce women illiteracy worldwide.
Would you like to be part of this movement? Shoot me an email using alvern (at) successunscrambled (dot) com.


16 thoughts on “The Best Software to Record a Podcast on Mac and Save $350”
Wow, there is a lot to consider if you’re thinking about starting a podcast! They are SO popular now though, so it’s a good idea if you’ve got a good concept and are willing to put in the time and effort – and research!
Indya, yes, they are quite popular indeed.
oh thanks a ton! I was looking for software to start a podcast and you came right on time
Lyosha, I’m so glad that you found this resource helpful.
This is such great tips, specially now with podcasts being so popular, they way to go!
Amalia, yes indeed!
Wow, these are great tips to record a podcast and will be handy. Thanks for sharing!
Nisha, you are very welcome.
Looking forward on knowming more abour podcasts as they are really rising these days
Yes Michael, podcasts are becoming more popular.
I’m not a Mac user but it’s still nice to know that you can record podcasts right on your laptop. I’ve been looking at how to make podcasts lately so this is in line with my current interest.
Ivan, that’s awesome to hear that you are interested in podcasting.
I don’t have mac my best friend does. She had been trying to do it, I will share this post with her to get help!
Monidipa, that’s cool that you’ll be able to assist her. The same process applies to PCs if you are using AnchorFM.
This is really helpful. I am planning to start my own podcast so, appreciate all the tips and product recommendations. I just realize I still lack quite a few equipment. Thank you for sharing this.
Clarice, starting a podcast is so exciting, all the best.
Comments are closed.